Wild Ride
Basic configuration
This section defines basic theme configuration
Main menu configuration
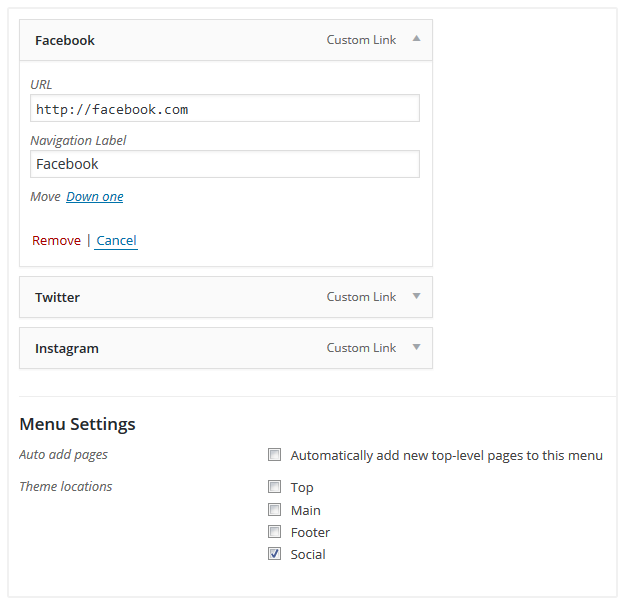
Navigate to Dashboard > Appearance > Menus in order to create the menu. Next please follow a "create a new menu" link, type Menu Name and save settings by pressing on "Save Menu" button. Then you're ready to start adding menu items, by default you can add pages, posts, categories, formats, or custom links.
After adding menu items and saving the menu you should define its position on the website. You can do that at the Manage Locations tab or right below the menu, in the Menu settings section. Your template includes a few sections (locations) to place your menu. It can be also displayed on the website using widgets.
- Top
- Main
- Footer
- Social
Then you can define menu position and check the result with customizer tool.
In order to show the list of social icons you need to create a separate menu with "Social Menu" title. Then please create menu items for needed social networks, and place this menu at the similar "Social" section. Social icons will be automatically applied. In order to change them to custom ones you just need to replace images keeping the same filenames and save changes. These icons will be also used at the "Follow" block.
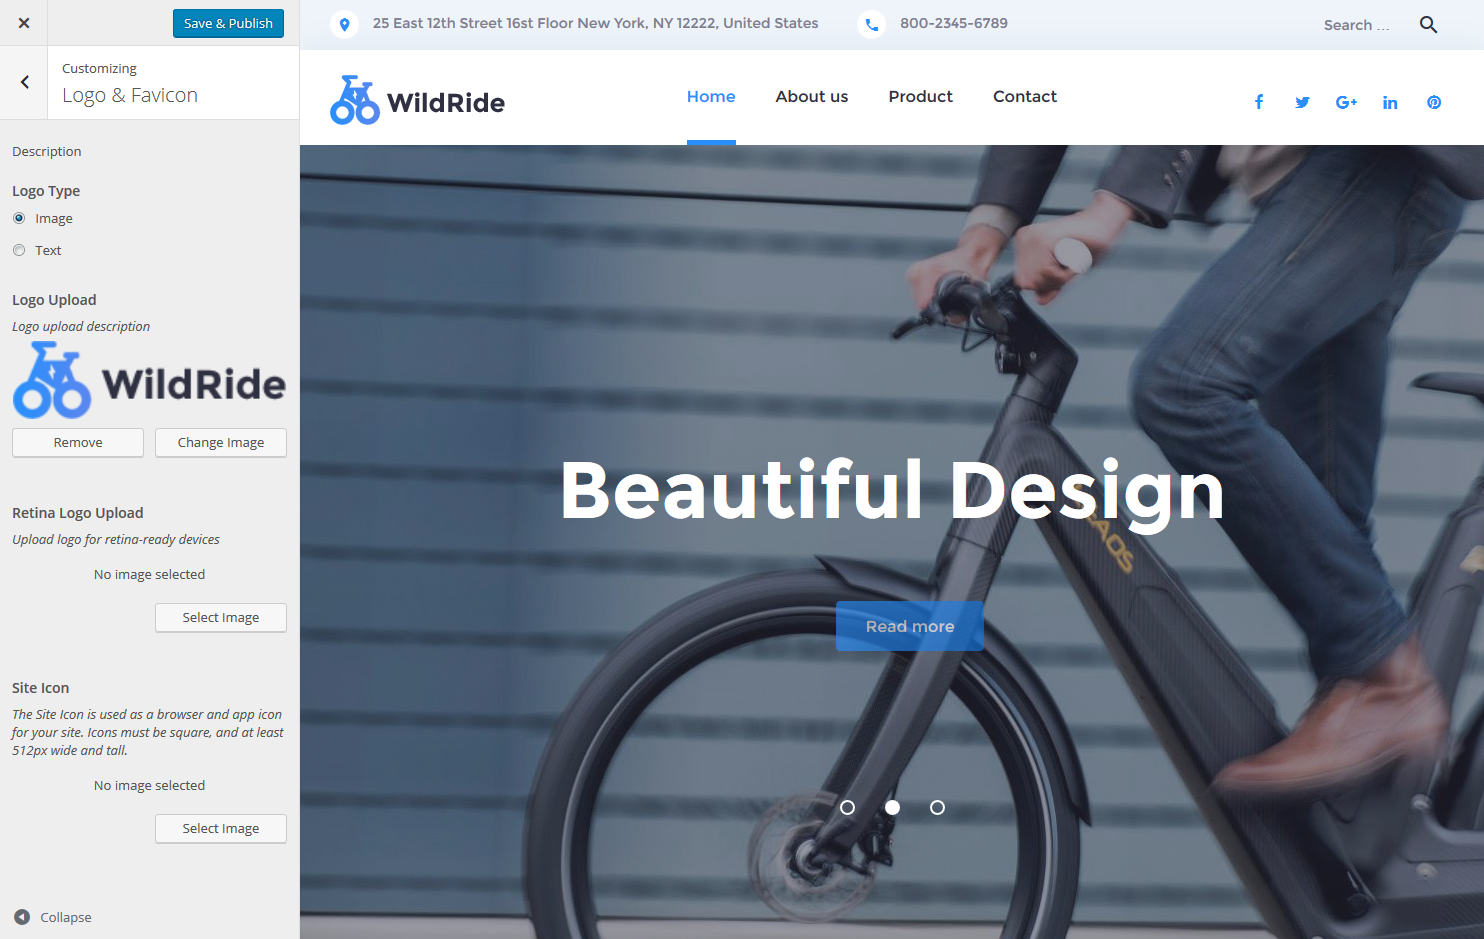
Template configuration at Customizer
Now your theme can be configured with the convenient intuitive WYSIWYG editor interface. Our template extends its functionality, so you have additional settings available. You'll easily adapt your settings.
There are two ways to start configuring, first is to navigate to Appearance > Customize section. Second way is to press on "Customize" at the top left corner on site frontend. This way allows you to edit the page you're currently viewing. And the first way initially shows site front page by default.
Left side of site interface lists settings available, and at the right side of the screen page template is displayed. After adding the changes you can save them by pressing on the "Save & Publish" button.
Feel free to check the following link to find out more details on working with customizer