Monstroid Premium Theme Documentation
Blog
No matter which method or methods you use to display your blog posts, the first thing you need to do is create the blog posts. Monstroid offers several blog post types on the way. And with the ability to assign custom categories to each post, you can easily display a set of posts based on category. See below for information on how to create blog posts.
Creating blog posts
Quick Edit
Navigate to Posts in your WordPress admin.
When hovering each title of each post, it will show actions: Edit, Quick Edit, Trash, View.
Follow the Steps Below To Create A Blog Post:
- Navigate to Posts in your WordPress admin.
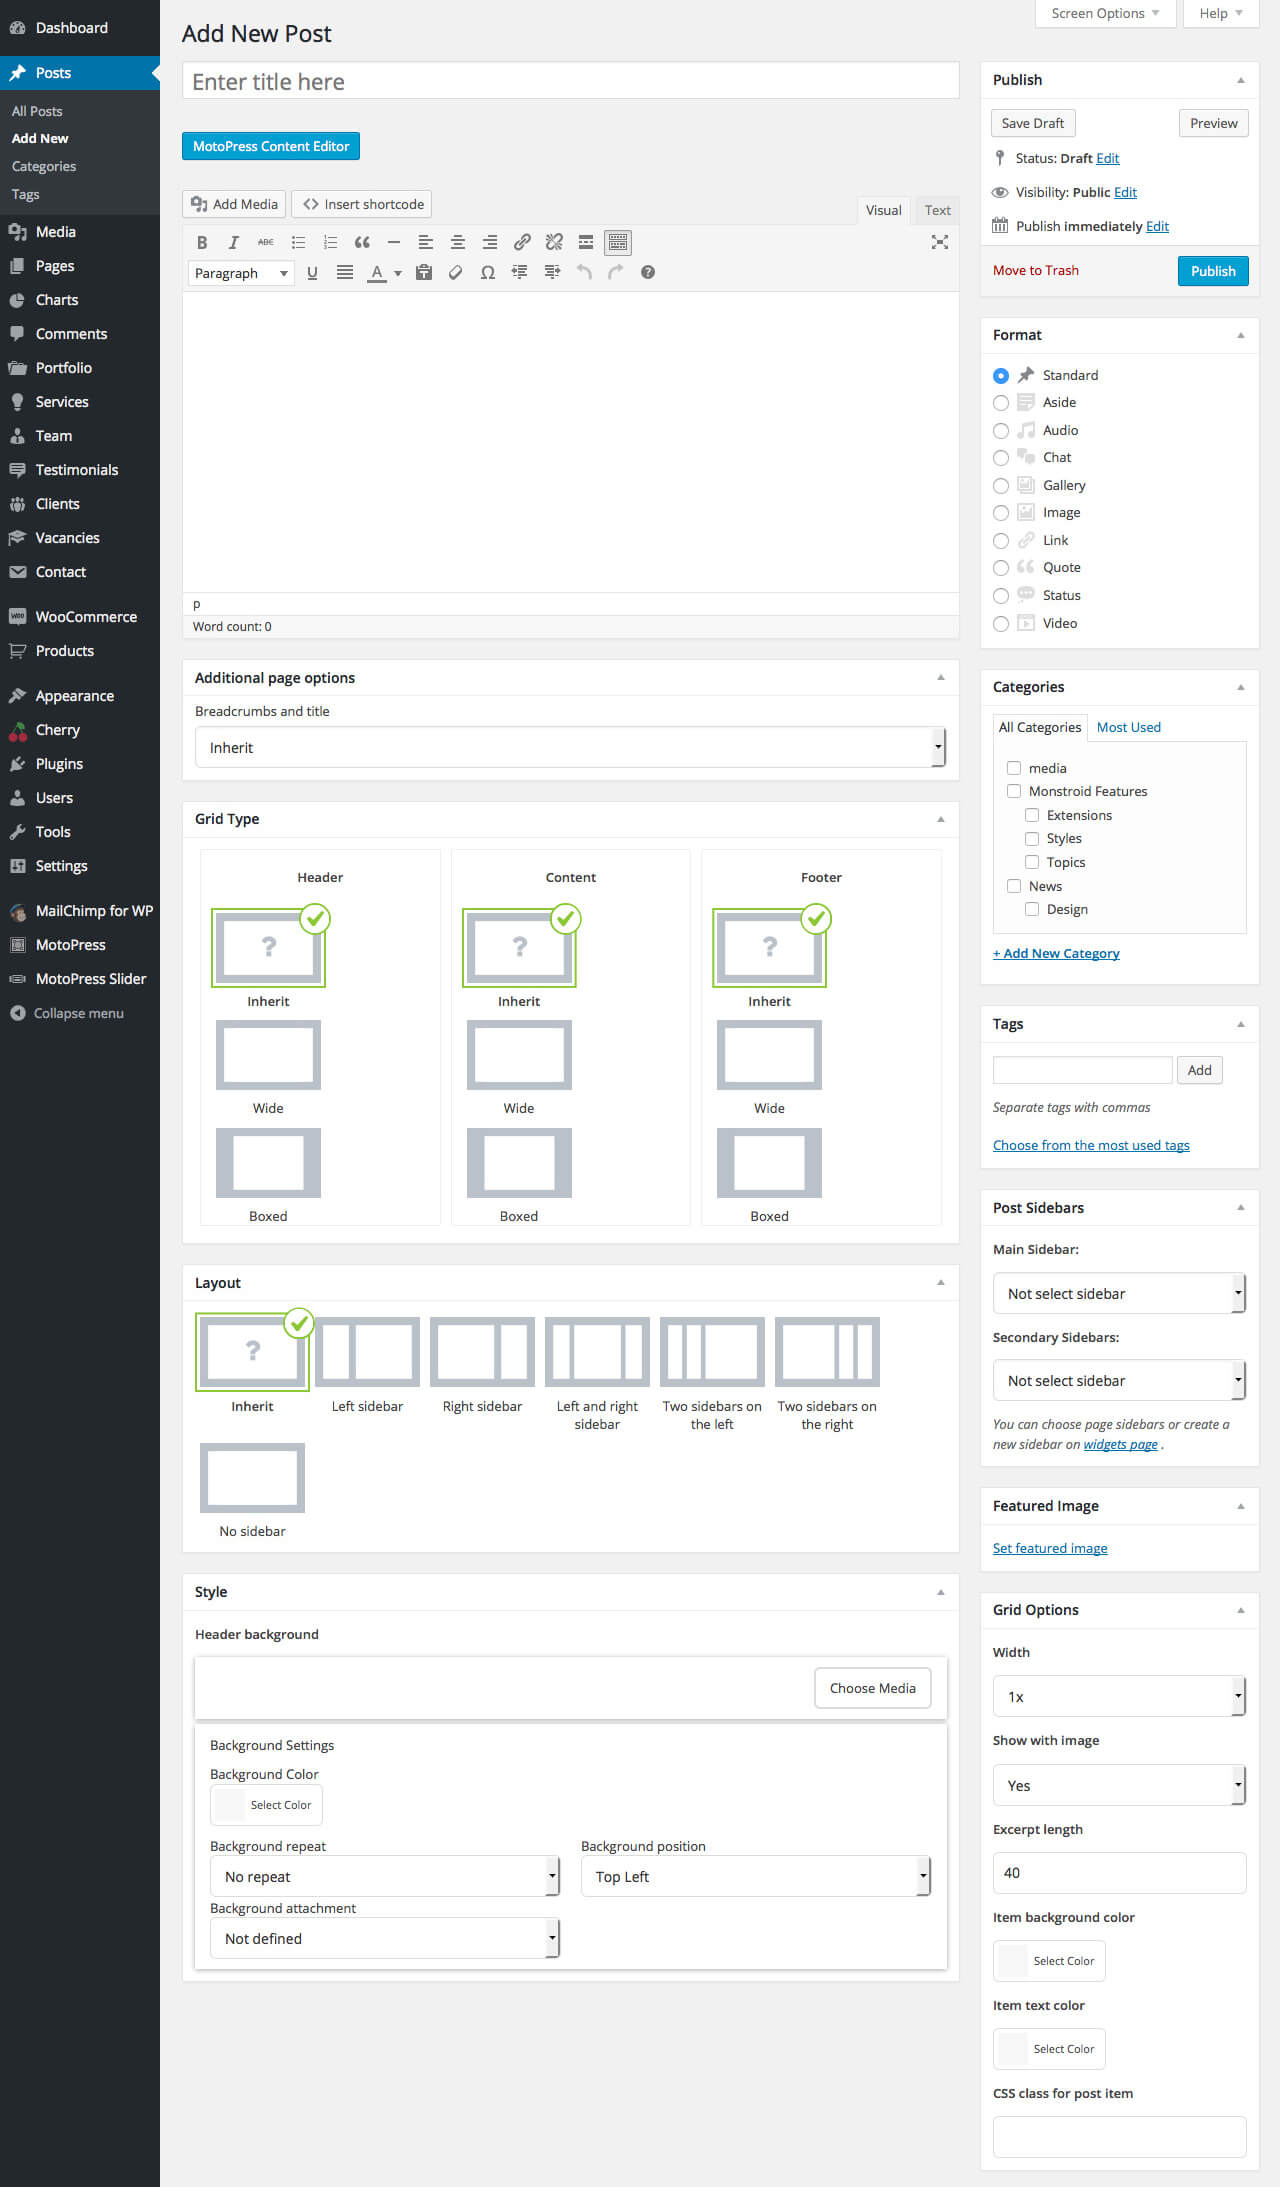
- Click on Add New to make a new post. Create a title and insert your post content in the editing field.
- Choose format of post from the right side. Default is Standard.
- Add Categories from the right side. To assign it to the post, check the box next to the Category name.
- Add Tags from the right side. Type the name of the tag in the field, separate multiple tags with commas.
- To add Featured image, click Featured Image Box, select an image and click “Set Featured Image”.
- Once you are finished, click Publish to save the post.
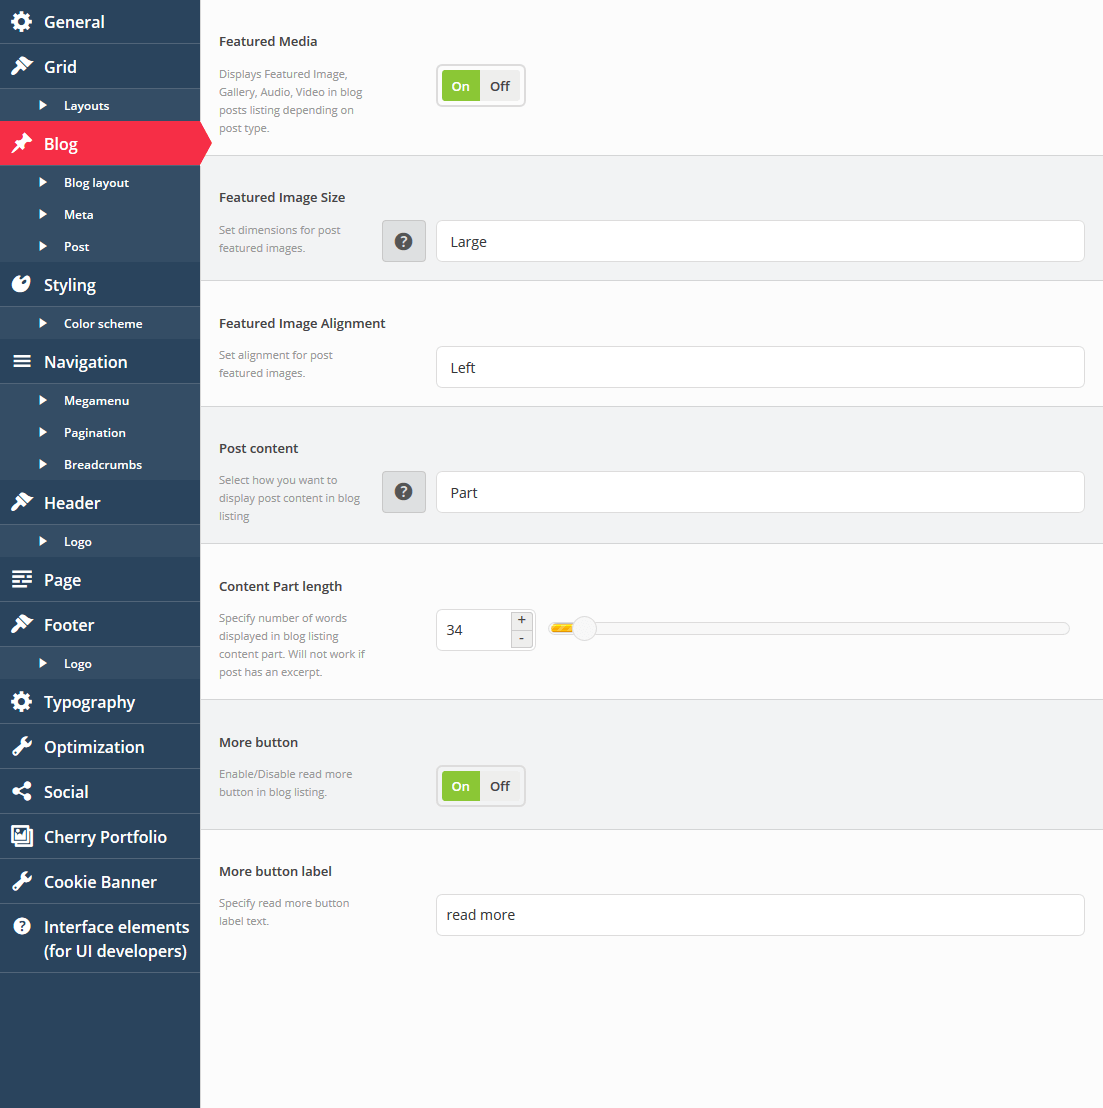
Blog Monstroid options
The section contains settings for WordPress blog pages (listing and single post types).
-
- Featured Media
- Displays Featured Image, Gallery, Audio, Video in blog posts listing depending on post type.
-
- Featured Image Size
- Set dimensions for post featured images.
-
- Featured Image Alignment
- Set alignment for post featured images.
-
- Post content
- Select how you want to display post content in blog listing
-
- Content Part length
- Specify number of words displayed in blog listing content part. Will not work if post has an excerpt.
-
- More button
- Enable/Disable read more button in blog listing.
-
- More button label
- Specify read more button label text.
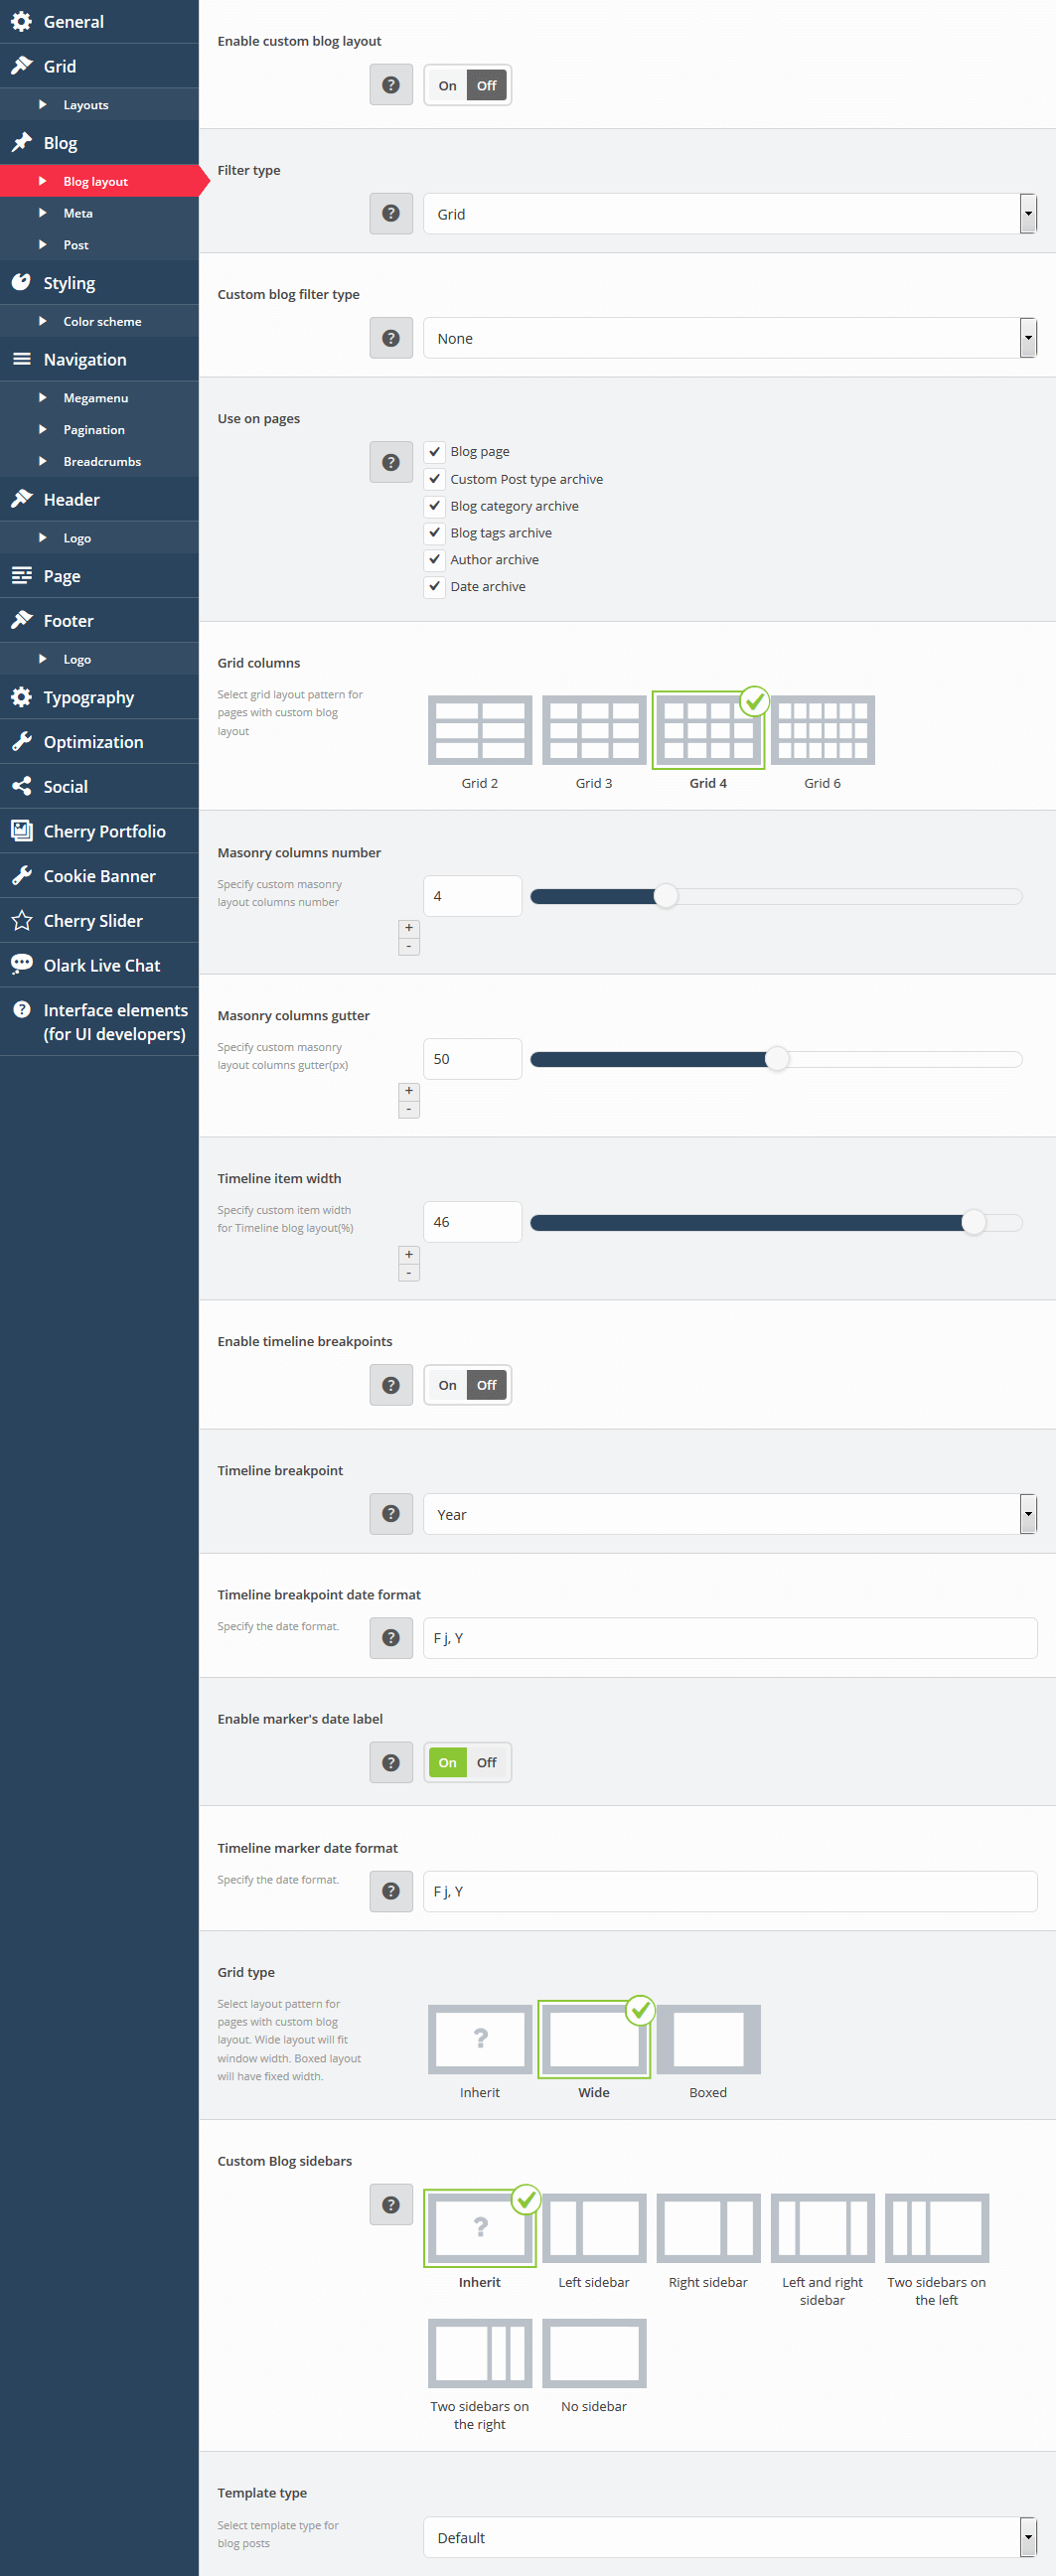
Blog > Layout
-
- Enable custom blog layout
- Enable/disable custom blog layout.
-
- Filter type
- Select if you want to filter posts by tag or by category.
-
- Custom blog filter type
- Select blog filter type.
-
- Use on pages
- Please specify pages that will use custom blog layout.
-
- Grid columns
- Select grid layout pattern for pages with custom blog layout.
-
- Masonry columns number
- Specify custom masonry layout columns number.
-
- Masonry columns gutter
- Specify custom masonry layout columns gutter(px).
-
- Timeline item width
- Specify custom item width for Timeline blog layout(%).
-
- Enable timeline breakpoints
- Enable/disable timeline breakpoints.
-
- Timeline breakpoint
- Select timeline breakpoint type.
-
- Timeline breakpoint date format
- Specify the date format.
-
- Enable marker's date label
- Enable/disable marker's date label.
-
- Timeline marker date format
- Specify the date format.
-
- Grid type
- Select layout pattern for pages with custom blog layout. Wide layout will fit window width. Boxed layout will have fixed width.
-
- Custom Blog sidebars
- You can choose if you want to display sidebars and how you want to display them.
-
- Template type
- Select template type for blog posts.
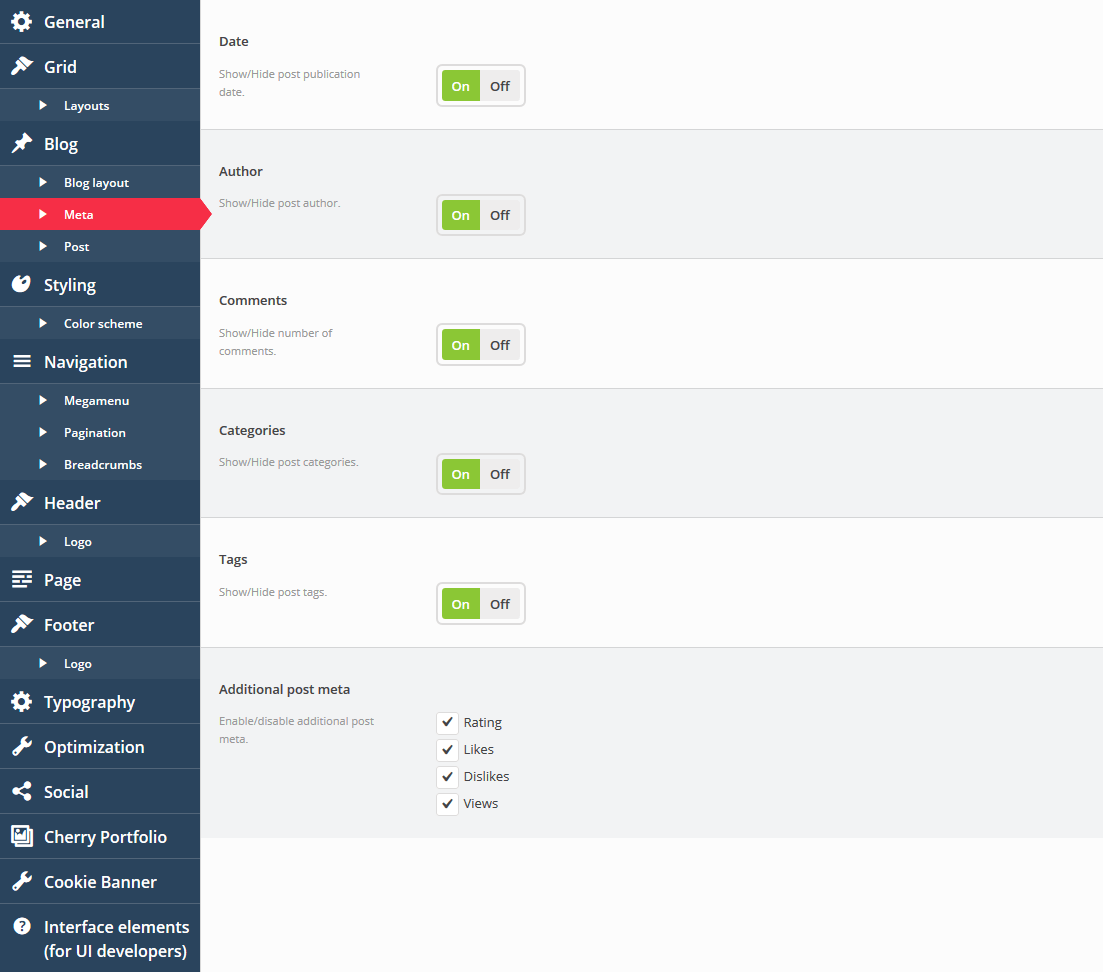
Blog > Meta
-
- Date
- Show/Hide post publication date.
-
- Author
- Show/Hide post author.
-
- Comments
- Show/Hide number of comments.
-
- Categories
- Show/Hide post categories.
-
- Tags
- Show/Hide post tags.
-
- Additional post meta
- Enable/disable additional post meta.
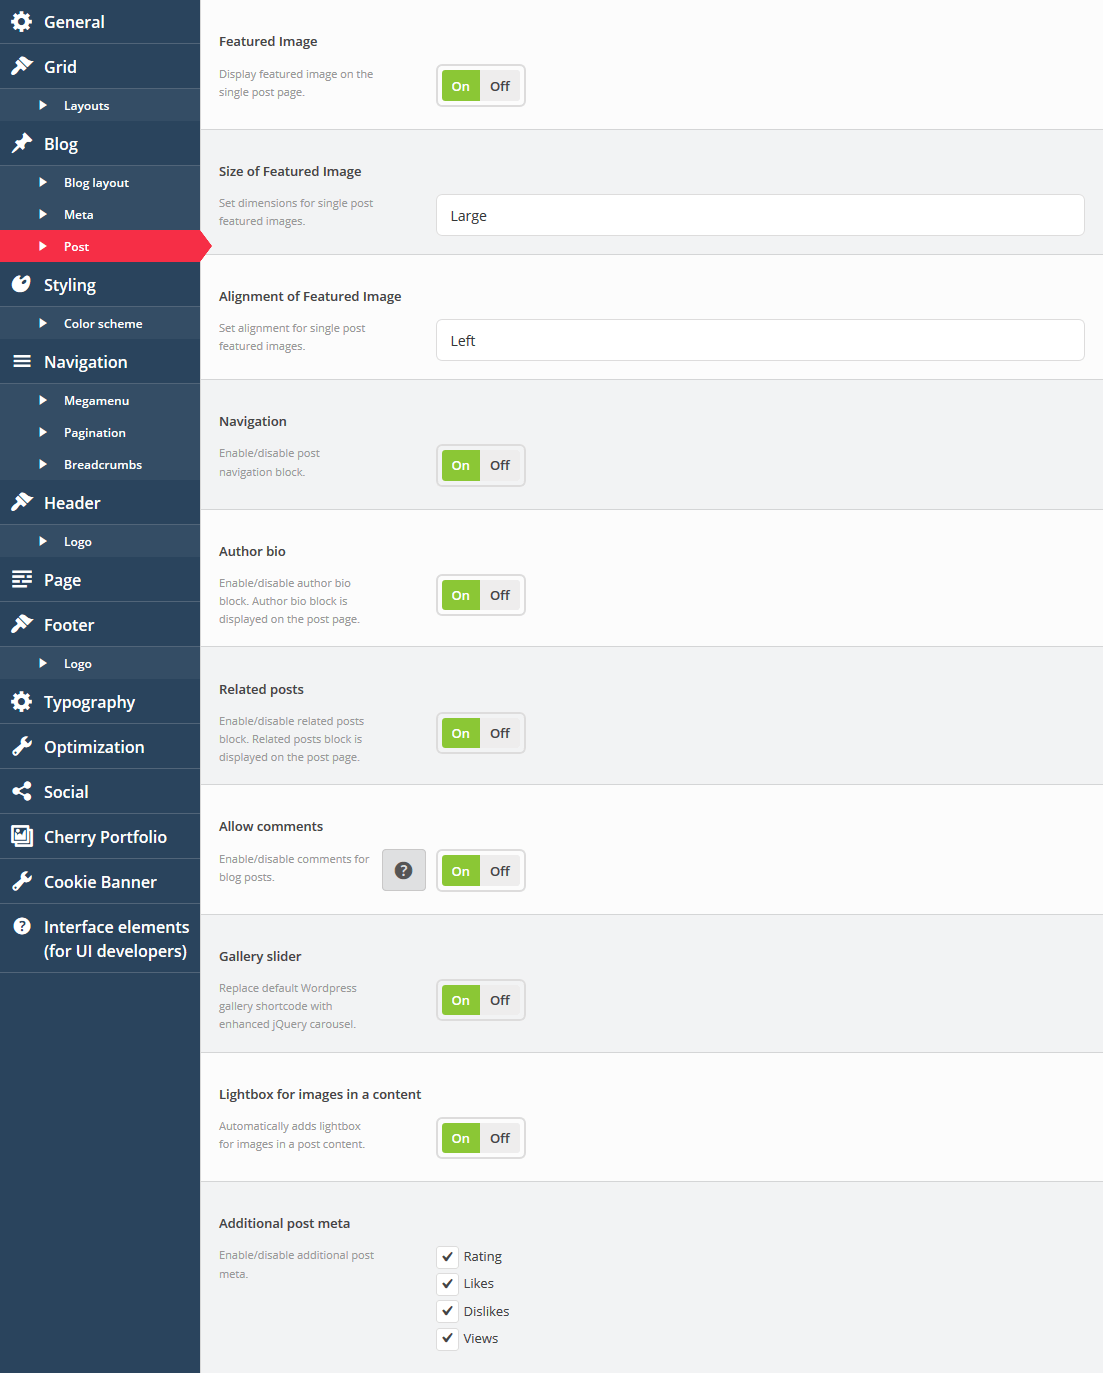
Blog > Post
-
- Featured Image
- Display featured image on the single post page.
-
- Size of Featured Image
- Set dimensions for single post featured images.
-
- Alignment of Featured Image
- Set alignment for single post featured images.
-
- Navigation
- Enable/disable post navigation block.
-
- Author bio
- Enable/disable author bio block. Author bio block is displayed on the post page.
-
- Related posts
- Enable/disable related posts block. Related posts block is displayed on the post page.
-
- Allow comments
- Enable/disable comments for blog posts.
-
- Gallery slider
- Replace default Wordpress gallery shortcode with enhanced jQuery carousel.
-
- Lightbox for images in a content
- Automatically adds lightbox for images in a post content.
-
- Additional post meta
- Enable/disable additional post meta.
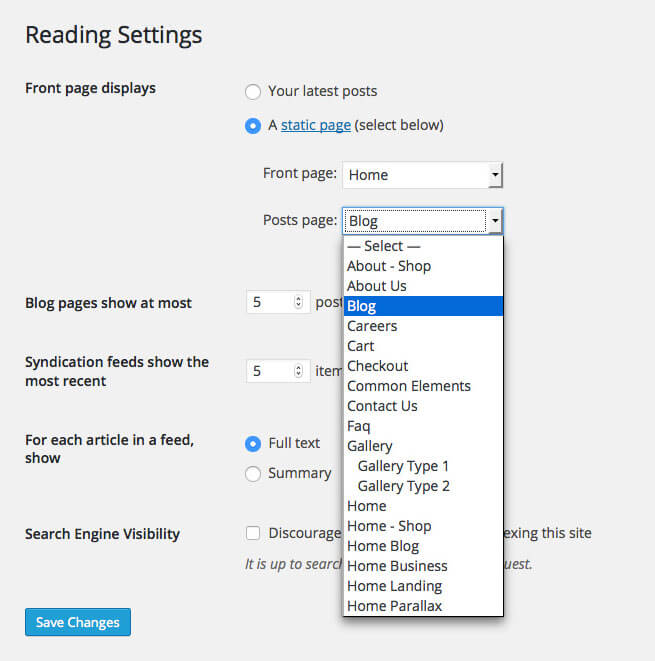
Assigning the blog page
The first blog method we will cover is the standard WordPress method, setting up an assigned blog or “post” page. It’s as simple as making a new page, and then telling WordPress to use that page as the post page.
Follow these Steps to assign a Posts Page
- Navigate to Pages and click Add New.
- Input a new name for your page, then find the Page Attributes box on the right side.
- Select the Default page template from the dropdown list.
- Select any number of page options in the Page Options Box.
- Click Publish to save the page.
- To set the page as your posts page, navigate to Settings > Reading and select your blog page name for the Posts Page. Doing this will automatically pull your blog posts and place them on the page.