Monstroid Premium Theme Documentation
Third-party Plugins
MotoPress Slider Plugin
MotoPress Slider is an easy to use and flexible solution for building compelling sliders with beautiful slides. It focuses on simplicity and functionality and offers all necessary tools to stand out among others. You can build your WordPress slider in two minutes and enjoy it from any size screen, as it looks great on any device.
This instruction is for templates with MotoPress Slider included. If you purchased MotoPress Slider as an additional offer .json file will not be present in the template package.
To make MotoPress Slider look like our live demo, please follow the instructions below:
Install and activate MotoPress Slider plugin.
Go to Dashboard > MotoPress Slider > and press the button "Import > Export".
Select MotoPress Slider Export .json file that you can find in your template package.
After importing the settings of the slider, the installation is complete.
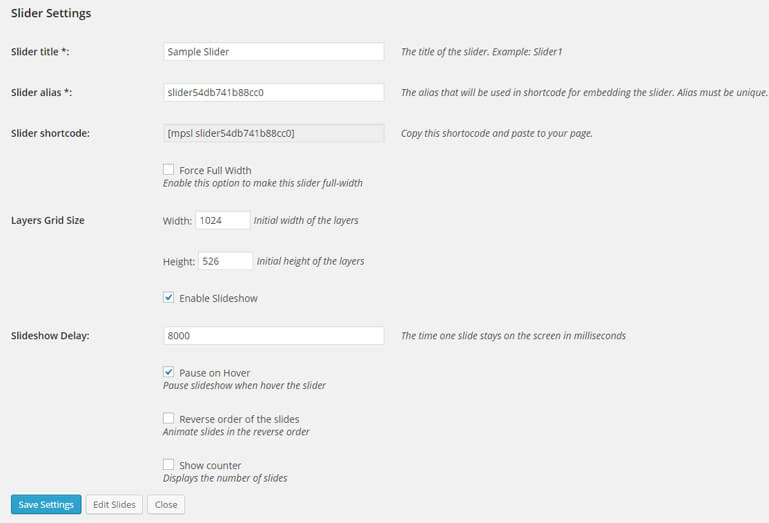
Slider settings:
-
- Slider title
- type the name of your slider, it should be easily recognizable in case you create several sliders for your website.
-
- Slider alias
- helps the slider to provide you with the slider shortcode. Its name has to be unique.
-
- Slider shortcode
- you'll insert this shortcode to the page or post where you want to place the slider.
-
- Force Full Width
- enable this option to make this slider full-width.
-
- Layers Grid Size
- enable to set width of your slider, indicate the layers grid size.
-
- Enable Slideshow
- enable or disable slideshow.
-
- Slideshow Delay
- the time one slide stays on the screen in milliseconds.
-
- Pause on Hover
- Pause slideshow when hovering the slider.
-
- Reverse order of the slides
- Animate slides in the reverse order.
-
- Show counter
- Displays the number of slides.
Slide settings:
After indicating the settings of the slider, it's time to start adding slides.
The process of customizing your slides is intuitive and simple. You just need to name your slide and select its background type: image or simply one color.
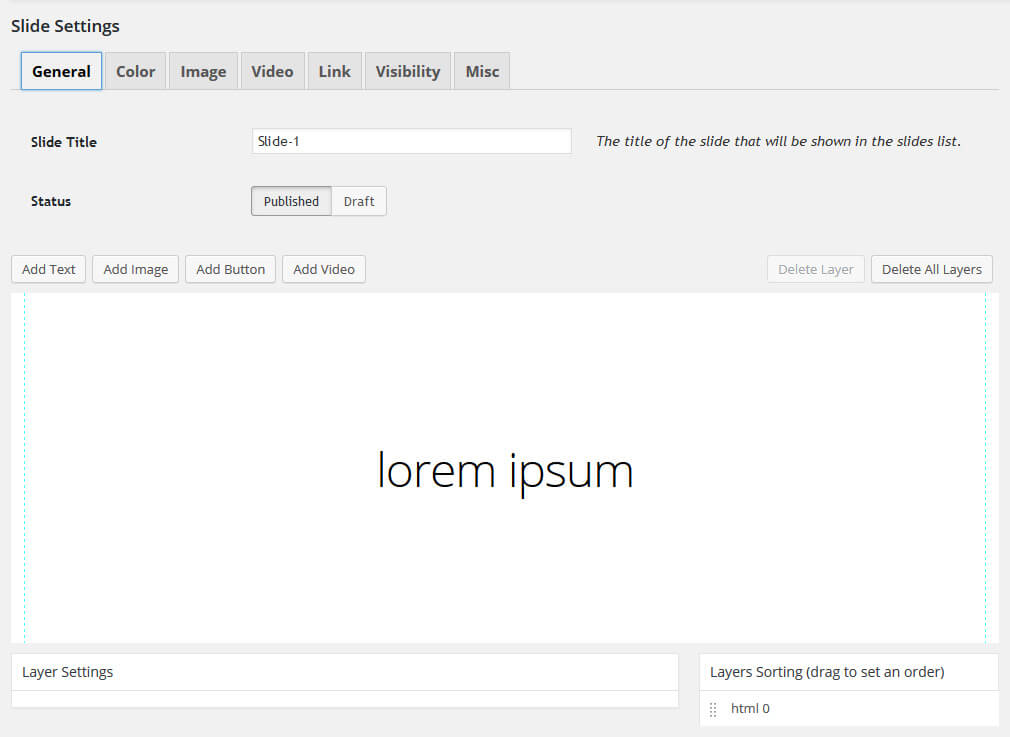
General:
-
- Slide Title
- the title of the slide that will be shown in the slides list.
-
- Status
- choose status for slide (Published or Draft).
Color:
-
- Background color type:
- choose Color or Gradient for background of slide.
-
- Background Color
- please insert the color (this option is only for Background color type "Color").
-
- Gradient color 1, Gradient color 2, Gradient angle
- insert two gradient colors and angle (these options are only for Background color type "Gradient").
Image:
-
- Image Source
- image can be added from your computer, Media Library or External URL.
-
- Size
- size of the slide image.
-
- Cover
- this means that the background image will be scaled as large as possible so the background area is fully covered with the image.
-
- Contain
- the image can be scaled to the largest size. Both width and height fit to the content area.
-
- Percentage
- the width and height of the background image can be fixed in percent.
-
- Normal
- the background image has its own width and height.
-
- Repeat
- background image can be repeated or not.
-
- Position
- choose the position of background image.
Video:
-
- Video Source MP4
- upload .MP4 video file.
-
- Video Source WEBM
- upload .WEBM video file.
-
- Video Source OGG
- upload .OGG video file.
-
- Loop Video
- allows you to loop the video.
-
- Mute Video
- allows you to mute the video.
-
- Video Fill-mode
- choose Fill or Fit.
-
- Video Cover
-
enable Video Cover.
-
- Video Cover Type
- choose Video Cover Type.
-
Link:
-
- Link this slide
- insert link.
-
- Open in new window
- open slide's link in new window.
-
- Link id
-
- Link class
-
- Link rel
-
- Link title
Visibility:
-
- Only logged
- in users can view this slide
-
- Visible from
- choose the starting day from calender
-
- Visible until
- choose the last day from calender
Misc:
-
- Class name
-
- CSS id
Layer settings:
The next step is to set the position of the background image and the 'repeat' option, but it depends on your wish only, as you can leave these fields empty.
For demonstration purposes, we'll use a few pictures in our slider to show you the advantages of the plugin. After setting the image options, you can get started with the Layer Settings.
This feature offers you a lot of customization options. You are able to create as many layers as you need. The layers can be presented as a text, image or button, for each layer you can set:
-
- Start Animation
- how it'll appear on a slide.
-
- End Animation
- the way how it will disappear from the slide.
-
- Display
- the time it takes for one layer to appear.
-
- Hide
- the time it takes for one layer to disappear. Note that time is calculated from the beginning of the slide and is indicated in milliseconds.
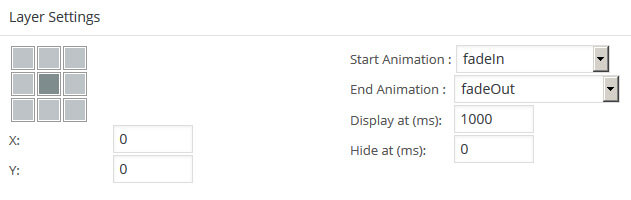
Layer settings also enable to specify the text of the layer and its style. When you finish with the adding layers you can set their order simply by dragging and dropping them in any specific sequence.
For more information please click here.
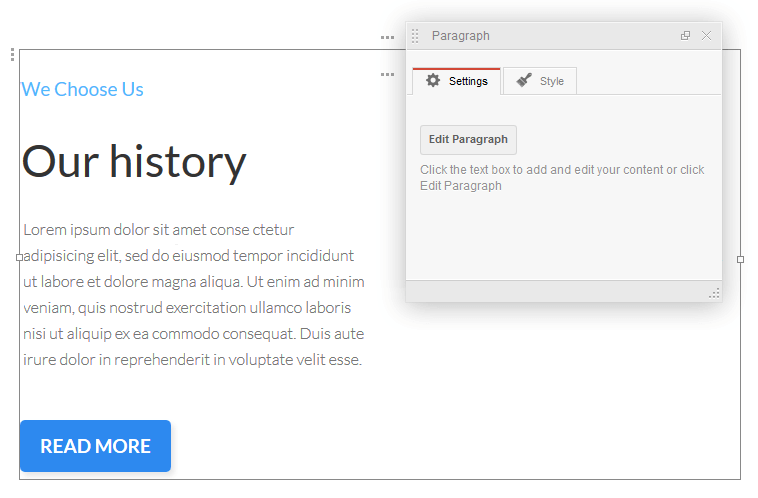
MotoPress Content Editor
MotoPress Content Editor enhances the standard WordPress builder and enables to create websites visually. It’s the complete solution for building responsive pages without coding simply by dragging and dropping content elements.
You have two ways of creating or editing content: in the visual MotoPress Content Editor or in the default WordPress editor.
If you prefer to create/edit content in the default WordPress editor, but would like to have it viewable and editable in the MotoPress editor, you need to follow the rules below.
Basic rules of organizing shortcodes:
The grid shortcode should come first. The Row → Column structure should always be kept.
[cherry_row]
	[cherry_col]
		Content
	[/cherry_col]
[/cherry_row]
Every element has to be placed inside the grid.
Let's take “cherry_spacer” as an example:
Correct:[cherry_row] [cherry_col] Content 1 [/cherry_col] [/cherry_row] [cherry_row] [cherry_col] [cherry_spacer size="20"] [/cherry_col] [/cherry_row] [cherry_row] [cherry_col] Content 2 [/cherry_col] [/cherry_row]
Incorrect:[cherry_row] [cherry_col] Content 1 [/cherry_col] [/cherry_row] [cherry_spacer size="20"] [cherry_row] [cherry_col] Content 2 [/cherry_col] [/cherry_row]
You can't insert a shortcode or a piece of content on the inner_row level. For example, it is wrong to insert my_shortcode without wrapping it into a grid.
Incorrect[cherry_row] [cherry_col] [cherry_row_inner] [cherry_col_inner] Content 1 [/cherry_col_inner] [/cherry_row_inner] [my_shortcode] [/cherry_col] [/cherry_row]
Here is how to create two columns:
[cherry_row]
	[cherry_col size_md="6"]
		Content 1
	[/cherry_col]
	[cherry_col size_md="6"]
		Content 2
	[/cherry_col]
[/cherry_row]
Several objects in a column
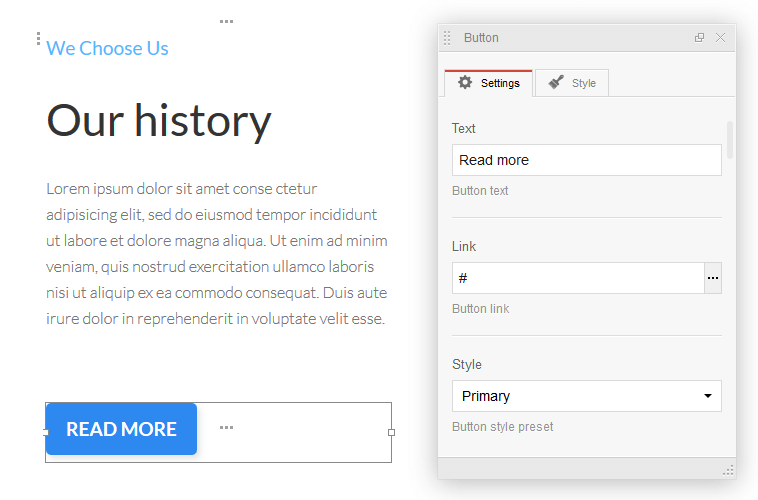
Each object in a column should be placed into a grid. Unless this is done, all the objects in the column will be interpreted as one block. Consequently, it will be impossible to customize objects individually. For example, in the second column, the "Content" text and the “cherry_button” shortcode are not separated by grid elements.
Incorrect:[cherry_row] [cherry_col size_md="6"] image [/cherry_col] [cherry_col size_md="6"] Content [cherry_button text="Read more" url="#" style="primary" size="medium" display="inline" radius="0" centered="no" fluid="no" fluid_position="left" icon_position="left" bg_color="#2D89EF" color="#FFFFFF" min_width="0" target="self" hover_animation="self"] [/cherry_col] [/cherry_row]
In the visual editor, this block looks like a single object.
You should add a new row and insert “Content” and the “cherry_button” shortcode into separate columns: cherry_row_inner → cherry_col_inner.
Cоrrect:[cherry_row] [cherry_col size_md="6"] image [/cherry_col] [cherry_col size_md="6"] [cherry_row_inner] [cherry_col_inner] Content [/cherry_col_inner] [/cherry_row_inner] [cherry_row_inner] [cherry_col_inner size_md="12"] [cherry_button text="Read more" url="#" style="primary" size="medium" display="inline" radius="0" centered="no" fluid="no" fluid_position="left" icon_position="left" bg_color="#2D89EF" color="#FFFFFF" min_width="0" target="self" hover_animation="self"] [/cherry_col_inner] [/cherry_row_inner] [/cherry_col] [/cherry_row]
Now each of the objects can be selected and customized separately in the visual editor.
Using Inner-Row. The following structure should be kept: row → col → row_inner → col_inner.
[cherry_row]
	[cherry_col]
		[cherry_row_inner]
			[cherry_col_inner]
				Content 1
			[/cherry_col_inner]
			[cherry_col_inner]
				Content 2
			[/cherry_col_inner]
		[/cherry_row_inner]
	[/cherry_col]
[/cherry_row]
Here is a nesting example (breaking one column into two):
[cherry_row]
	[cherry_col]
		[cherry_row_inner]
			[cherry_col_inner]
				Content 1
			[/cherry_col_inner]
			[cherry_col_inner]
				Content 2
			[/cherry_col_inner]
		[/cherry_row_inner]
	[/cherry_col]
[/cherry_row]
Using the cherry_box shortcode.
The cherry_box shortcode has to be placed into row → col. Inside the shortcode, you can use row_inner → col_inner.
[cherry_row]
	[cherry_col size_md="12"]
		[cherry_box preset="primary" bg_color="#a9e05b"]
			[cherry_row_inner]
				[cherry_col_inner size_md="4"]
					Column content 1
				[/cherry_col_inner]
				[cherry_col_inner size_md="4"]
					Column content 2
				[/cherry_col_inner]
				[cherry_col_inner size_md="4"]
					Column content 3
				[/cherry_col_inner]
			[/cherry_row_inner]
		[/cherry_box]
	[/cherry_col]
[/cherry_row]
If "cherry_box" wrapped in a grid is placed into row_inner, you can't use another row_inner inside of it.
The number of columns in a row should not exceed twelve (the default value).
WPML configuration
WPML consists of several modules. The basic module turns WordPress sites multilingual. Other modules help with an enhanced translation process, string translation, media translation and other functions.
You can learn about the different modules in the WPML Core and Addons page.
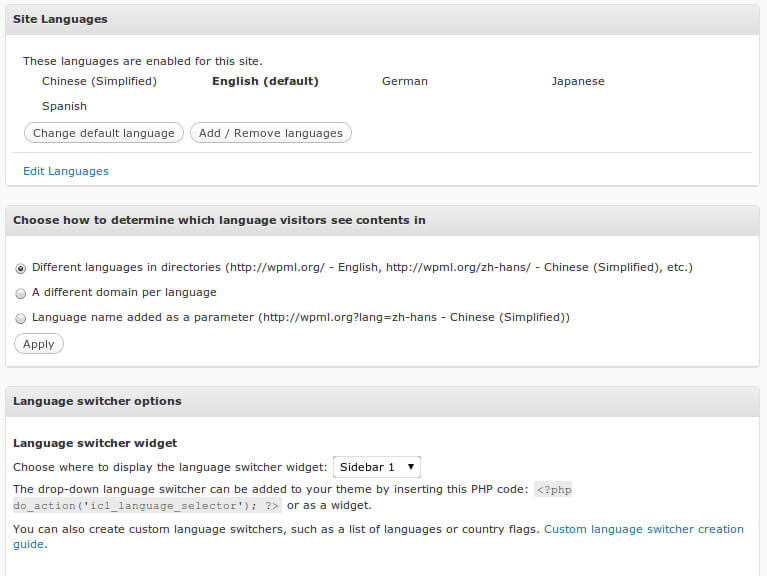
After you enable WPML, you’ll see a Multilingual Widget in the Admin Dashboard. This widget provides access to the different functions in WPML. You can also access them through the WPML menu.
- Languages – Determine the site’s languages and control how different language contents are organized.
- Theme and plugins localization – Choose between the traditional .mo files or using WPML’s String Translation.
- Navigation – Control the appearance of site-wide navigation based on WordPress pages.
- Sticky links – This is an essential function for running full websites with WordPress. It guarantees that links between pages can never break.
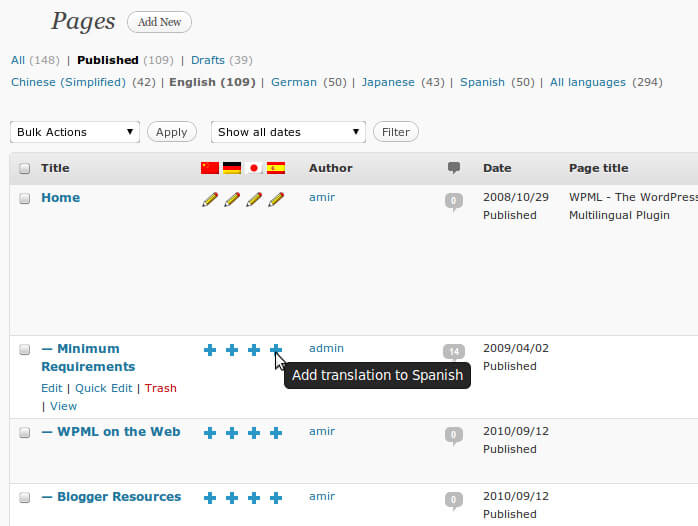
Translating Site Content
WPML creates different posts, pages and custom types for translations and connects them together. This means that every page has its own title, body and meta-fields.
WPML offers two ways for translating content:
- Manually, by clicking on the + icons
- Using WPML’s Translation Management module
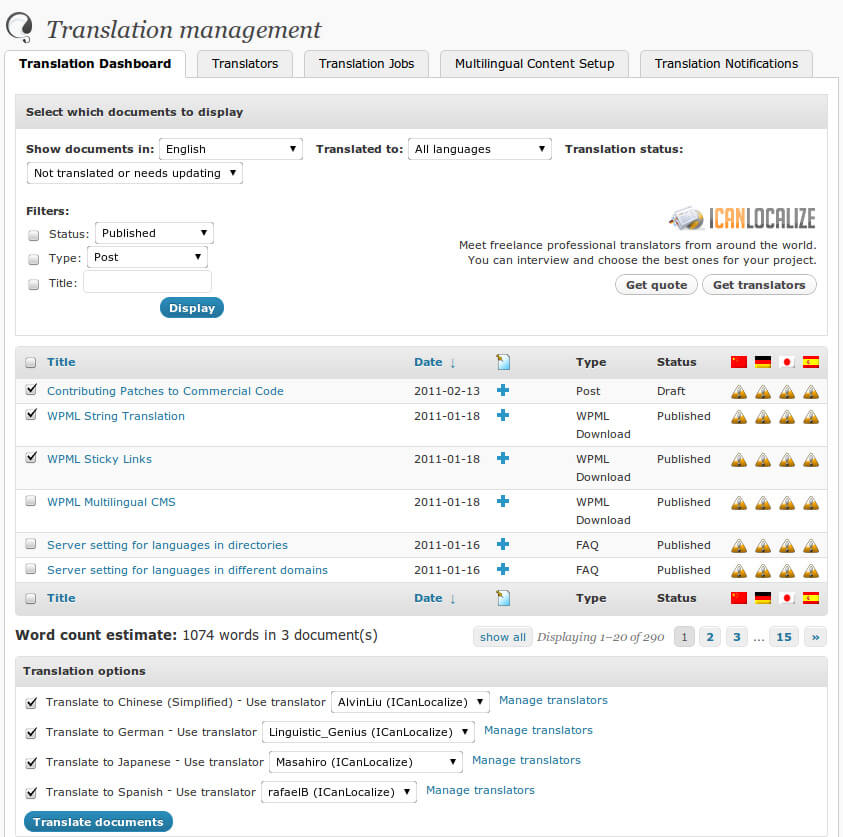
Translation Dashboard
Contact form 7
Contact Form 7 plugin can manage multiple contact forms. It also lets you customize the form and the mail contents flexibly with simple markup.
Displaying a Form
Let’s start with displaying a form on your page. First, open the 'Contact -> Contact Forms' menu in your WordPress administration panel.
You can manage multiple contact forms there.
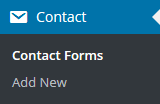
Just after installing the Contact Form 7 plugin, you’ll see a default form named “Contact form 1″ and a code like this:
[contact-form-7 id="1234" title="Contact form 1"]
Copy this code. Then open the edit menu ('Pages -> Edit') of the page where you wish to place the contact form. A popular practice is creating a page named 'Contact' for the contact form page. Paste the code you copied into the contents of the page.
Now your contact form setup is complete. Your site visitors can now find the form and start submitting messages to you.
Next, let’s see how you can customize your form and mail content.
Customizing a Form
Title for this contact form(1). This title is just a label for a contact form and is used only for administrative purposes. You can use any title you like, e.g. “Job Application Form,” “Form for Event 2016/01/01″ and so on.
Shortcode for this contact form (2). Copy this code and paste it into your post, page or text widget where you want to place this contact form.
Form Tab
Form editing field (4). You can customize form content here using HTML and form-tags. Line breaks and blank lines in this field are automatically formatted with <br/> and <p> HTML tags.
Tag generators (3). By using these tag generators, you can generate form-tags without knowledge of them.
For more information about form-tags, see How Tags Work.
Mail Tab
You can edit the mail template for mail which is sent in response to a form submission. You can use mail-tags in these fields.
An additional mail template is also available. It is called Mail(2) and its content can differ from the primary Mail template.
For more information, see Setting Up Mail.
Messages Tab
You can edit messages that are used for various situations, including “Validation errors occurred,” “Please fill in the required field,” etc.
Note that only plain text is available here. HTML tags and entities are not allowed in the message fields.
Additional Settings Tab
You can add customization code snippets here. For details, see Additional Settings.
MailChimp for WordPress
MailChimp for WordPress plugin helps you add subscribers to your MailChimp lists using various methods. You can create good looking opt-in forms or integrate with any other form on your site, like your comment form or WooCommerce checkout.
Installing MailChimp for WordPress Lite
Like other free WordPress plugins, installing the MailChimp for WordPress Lite plugin is quite easy-going. All you need is a MailChimp account and a self-hosted website.
In your WordPress admin panel, go to Plugins > New Plugin, search for MailChimp for WordPress and click "Install now"
Alternatively, download the plugin and upload the contents of mailchimp-for-wp.zip to your plugins directory, which usually is /wp-content/plugins/.
Activate the plugin.
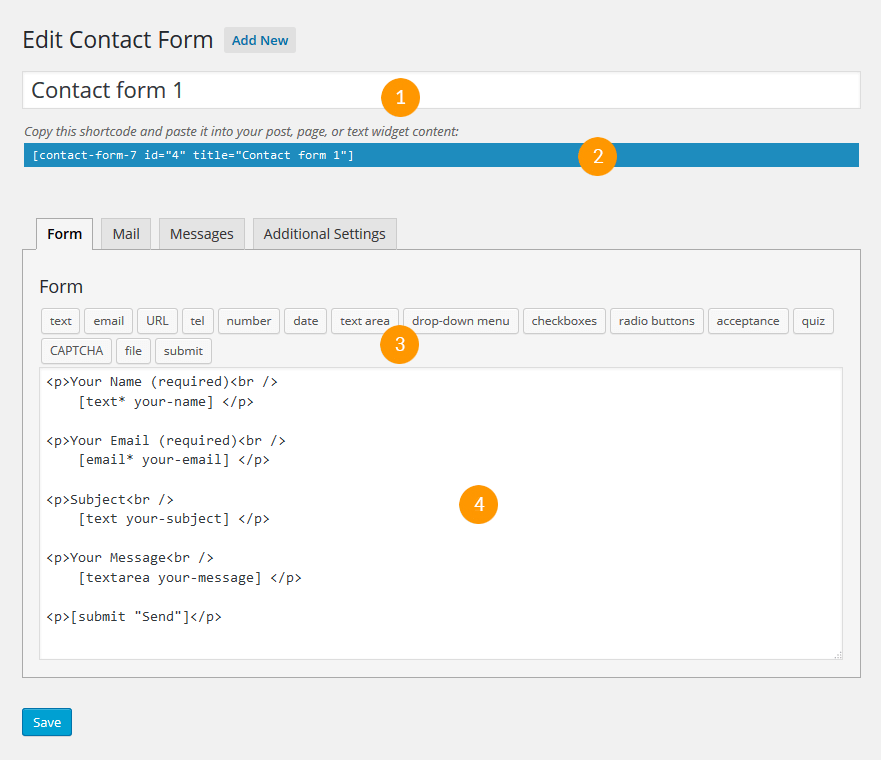
Set your MailChimp API key in the plugin settings.
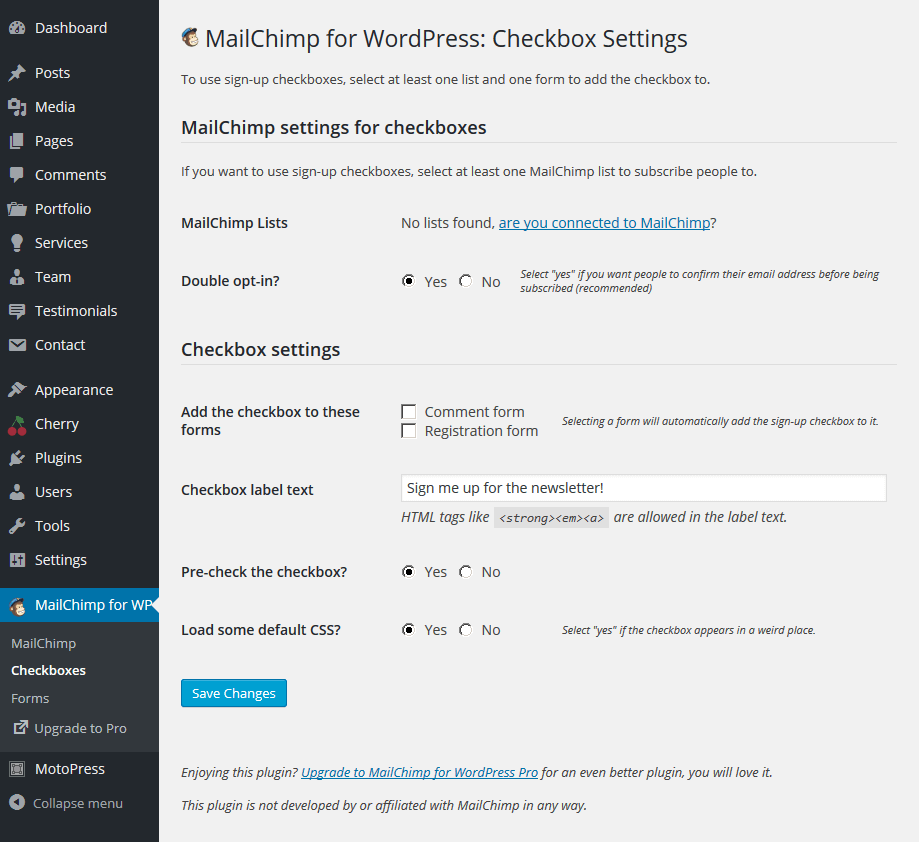
Checkbox Settings
MailChimp settings for checkboxes
-
- MailChimp Lists
- Choose the list.
-
- Double opt-in?
- Select "yes" if you want people to confirm their email address before being subscribed (recommended).
Checkbox settings
-
- Add the checkbox to these forms
- Selecting a form will automatically add the sign-up checkbox to it.
-
- Checkbox label text
- Insert the text.
-
- Pre-check the checkbox?
- Select "yes" if you want to pre-check.
-
- Load some default CSS?
- Select "yes" if the checkbox appears in a weird place.
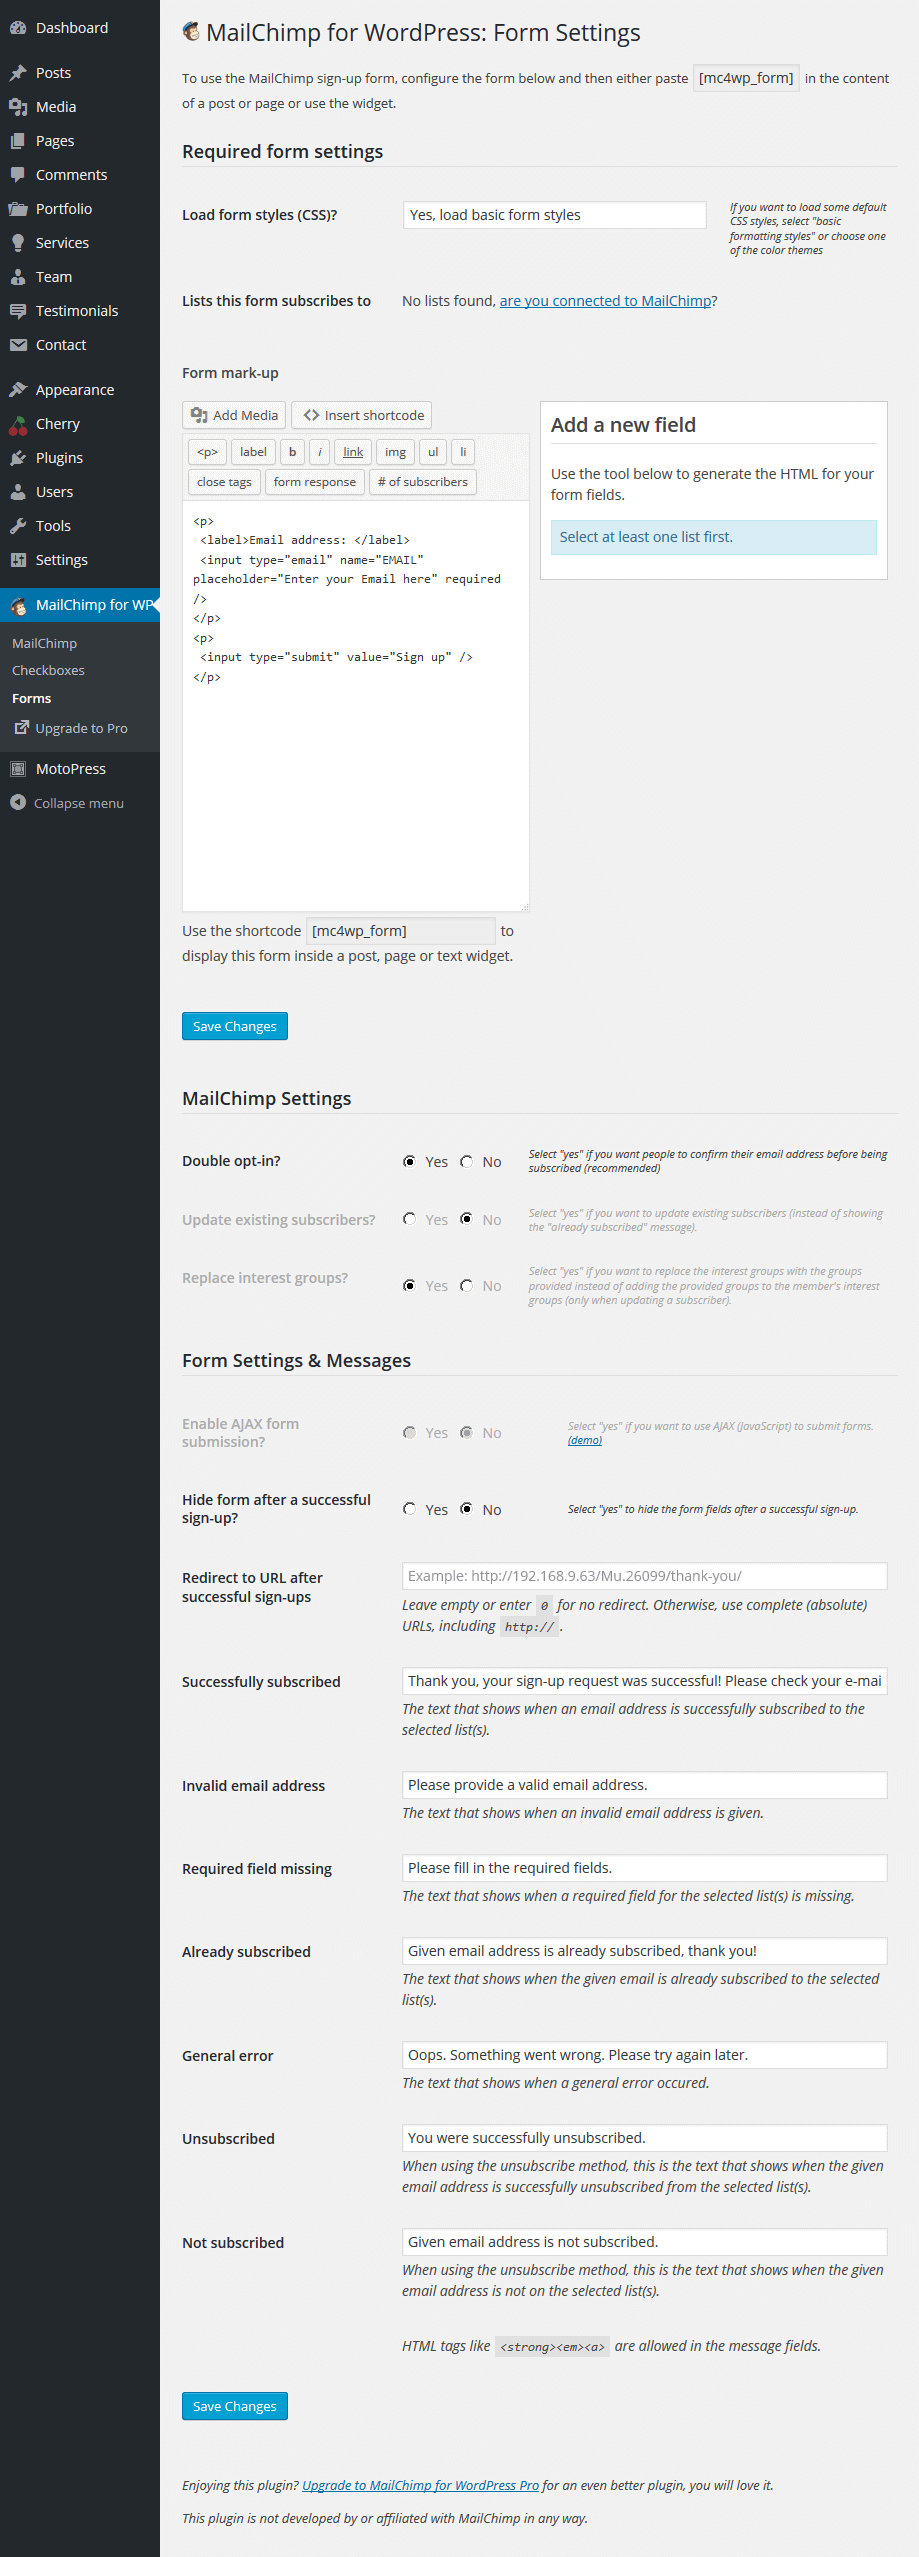
Form Settings
Required form settings
-
- Load form styles (CSS)?
- If you want to load some default CSS styles, select "basic formatting styles" or choose one of the color themes.
-
- Lists this form subscribes to
- Choose the list.
-
- Form mark-up
- Use the shortcode to display this form inside a post, page or text widget.
MailChimp Settings
-
- Double opt-in?
- Select "yes" if you want people to confirm their email address before being subscribed (recommended).
-
- Update existing subscribers?
- Select "yes" if you want to update existing subscribers (instead of showing the "already subscribed" message). This option is only available in MailChimp for WordPress Pro.
-
- Replace interest groups?
- Select "yes" if you want to replace the interest groups with the groups provided instead of adding the provided groups to the member's interest groups (only when updating a subscriber). This option is only available in MailChimp for WordPress Pro.
Form Settings & Messages
-
- Enable AJAX form submission?
- Select "yes" if you want to use AJAX (JavaScript) to submit forms. This option is only available in MailChimp for WordPress Pro.
-
- Hide form after a successful sign-up?
- Select "yes" to hide the form fields after a successful sign-up.
-
- Redirect to URL after successful sign-ups
- Leave empty or enter 0 for no redirect. Otherwise, use complete (absolute) URLs, including http://.
-
- Successfully subscribed
- The text that shows when an email address is successfully subscribed to the selected list(s).
-
- Invalid email address
- The text that shows when an invalid email address is given.
-
- Required field missing
- The text that shows when a required field for the selected list(s) is missing.
-
- Already subscribed
- The text that shows when the given email is already subscribed to the selected list(s).
-
- General error
- The text that shows when a general error occured.
-
- Unsubscribed
- When using the unsubscribe method, this is the text that shows when the given email address is successfully unsubscribed from the selected list(s).
-
- Not subscribed
- When using the unsubscribe method, this is the text that shows when the given email address is not on the selected list(s).
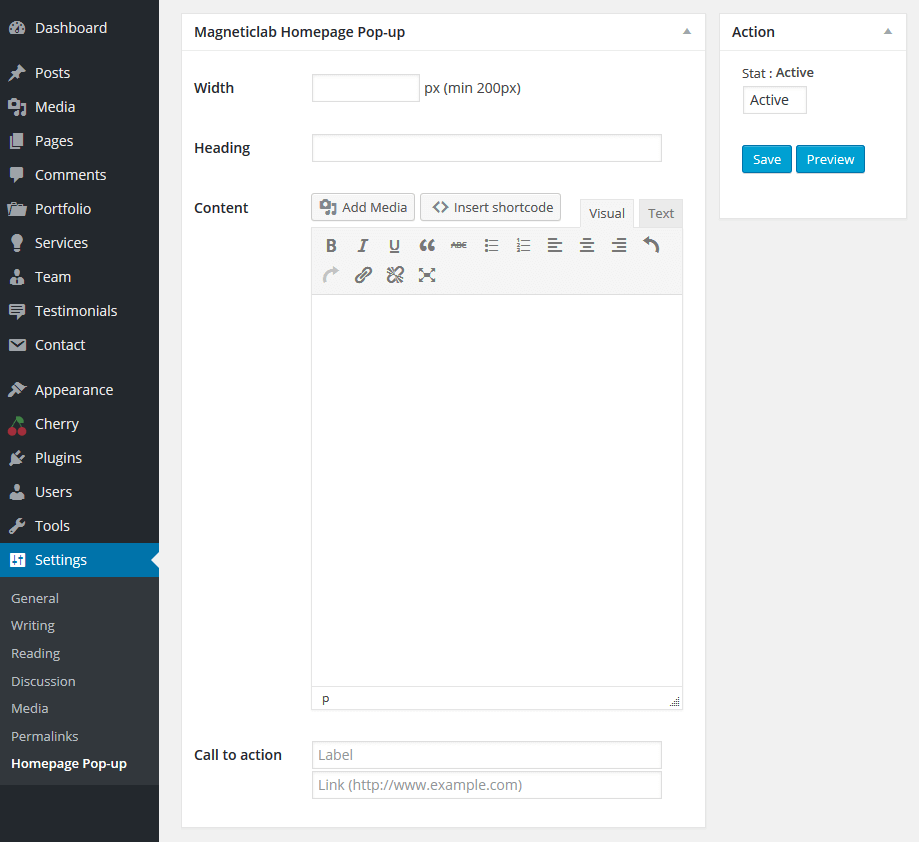
Homepage Pop-up
Homepage Pop-up plugin for adding a simple jquery pop-up on the home page. Add a title and an important information on your home page without getting blocked any by A.
Installing Homepage Pop-up plugin
Upload 'mlab_popup' to the '/wp-content/plugins/' directory.
Activate the plugin through the 'Plugins' menu in WordPress.
Go to Dashboard > Settings > Homepage Pop-up
Create your first pop-up for your homepage!
Magneticlab Homepage Pop-up
-
- Width
-
- Heading
-
- Content
-
- Call to action